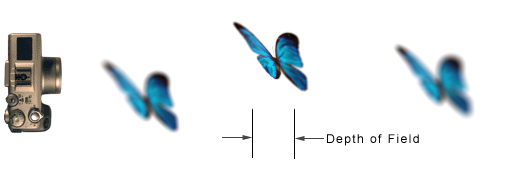
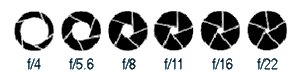
Aperture
The aperture within a lens is controlled by the iris and is measured in f-stops.
The f-stops available depend upon the lens but typical f-stops may vary from f/4 (wide open) to say f/22 (a small aperture).
 Exposure
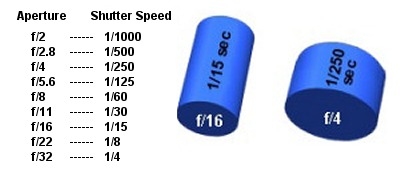
The 'Exposure' is how much light falls on to the digital sensor.
This is determined by the 'Shutter Speed' - how long the shutter stays open, and the 'Aperture' - which is a multi-bladed iris diaphragm in the lens which can be opened up or closed down to restrict the amount of light reaching the digital sensor.
The 'Shutter Speed' and 'Aperture' together determine the exposure so it is possible to have a fast shutter speed combined with a wide aperture or a slow shutter speed combined with a small aperture to give the same exposure.
 Metering
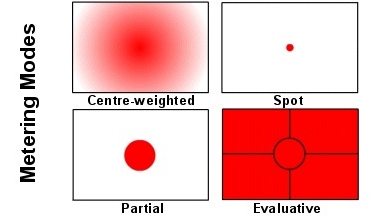
Your camera should be equipped with an in-built 'Meter'. The 'Metering' System will automatically work out the correct 'Exposure' by taking an average of all the tones in the complete image.
Some cameras also have additional Metering Modes such as 'Centre-weighted' and 'Spot-Metering'. These modes work out the 'Exposure' by averaging the tones in only part of the image, usually the centre.
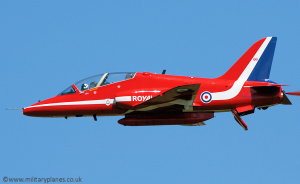
When taking photos of an aircraft against a white/grey sky it is a good idea to meter from just the centre of the image so that the camera exposes the aircraft properly.
 ISO
ISO
The 'ISO' on a digital camera is the light sensitivity of the camera's image sensor. This is called the Sensor Speed or sometimes the Film Speed.
This means that if you use a higher 'ISO' then you will be able to expose the image correctly with a higher 'Shutter speed' and/or smaller 'Aperture' which is useful on an overcast day.
Unfortunately, the higher you set the 'ISO' then the more grainy/noisy the resulting image will be. A low 'ISO' speed would be used in bright sunny weather (e.g. ISO 100) and a higher 'ISO' speed would be used in overcast/darker conditions (e.g. ISO 200, ISO 400, or even ISO 800).
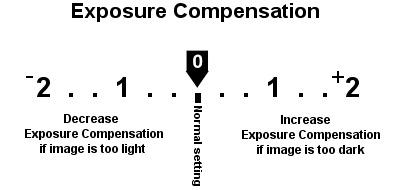
Exposure Compensation
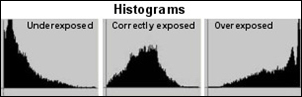
When you take photos of aircraft against a white/grey sky then the camera's metering system can under-expose the actual aircraft even when the 'Metering Mode' is set to 'Partial metering'.
This is because the camera's in-built 'Metering System' is calibrated to a so-called middle grey colour which is mid-way between black and white and reflects 18% of the incoming light.
When it takes an average of all the tones in the image and sees a large expanse of white sky then the actual aircraft becomes under-exposed.
To compensate for this you need to increase the 'Exposure Compensation' on the camera. You can usually increase it at 1/3 stop increments until you get the desired results.
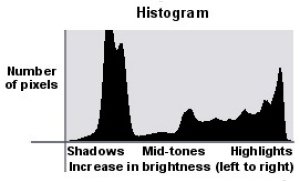
On a digital SLR you can take a photo and look at the LCD screen to see if it looks exposed correctly or better still by examining the 'Histogram' of the photo.
Be aware that a slightly underexposed image is preferable to an overexposed image as an underexposed image can sometimes be rescued with a bit of post-processing while an overexposed image is usually beyond repair.

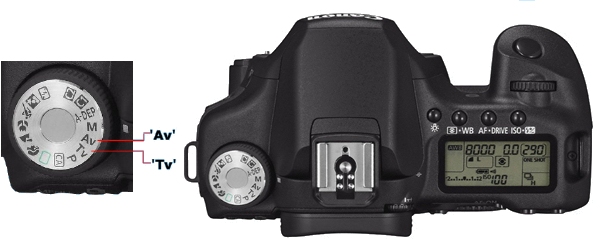 'Av' Mode